How to set up Invitee User Role
Businesses can assign multiple users with different roles for monitoring and managing the GuestTrack system across multiple projects with maximum flexibility.

Businesses can assign multiple users with different roles for monitoring, managing the Guest Track system across multiple Projects with maximum flexibility. The below tables explain the user management feature and User Role permissions.
User Management Features Pricing
| User management Features | 14 days Trial (Free) | Basic ($9.90 AUD/month) | Basic + User Role ($19.80 AUD/month) | Basic + User Role + Unlimited Users ($29.70 AUD/month) |
|---|---|---|---|---|
| Create Administrator User | ✔︎ | ✔︎ | ✔︎ | ✔︎ |
| Create Read Record Only User | - | - | ✔︎ | ✔︎ |
| Create Full Record Access User | - | - | ✔︎ | ✔︎ |
| Max number of Users | 3 | 10 | 10 | Unlimited |
User Permissions
| Feature | Read Records Only User | Full Record Access User | Administrator | Master Account |
|---|---|---|---|---|
| Visitor Records | ✔︎ | ✔︎ | ✔︎ | ✔︎ |
| Registrations | ✔︎ | ✔︎ | ✔︎ | ✔︎ |
| Import Records | - | ✔︎ | ✔︎ | ✔︎ |
| Check In & Out | - | ✔︎ | ✔︎ | ✔︎ |
| Analytics | - | ✔︎ | ✔︎ | ✔︎ |
| Guest Badges | - | - | ✔ | ✔︎ |
| Project Settings | - | - | ✔ | ✔︎ |
| User Management | - | - | - | ✔︎ |
| Subscription | - | - | - | ✔︎ |
How To Create User Roles
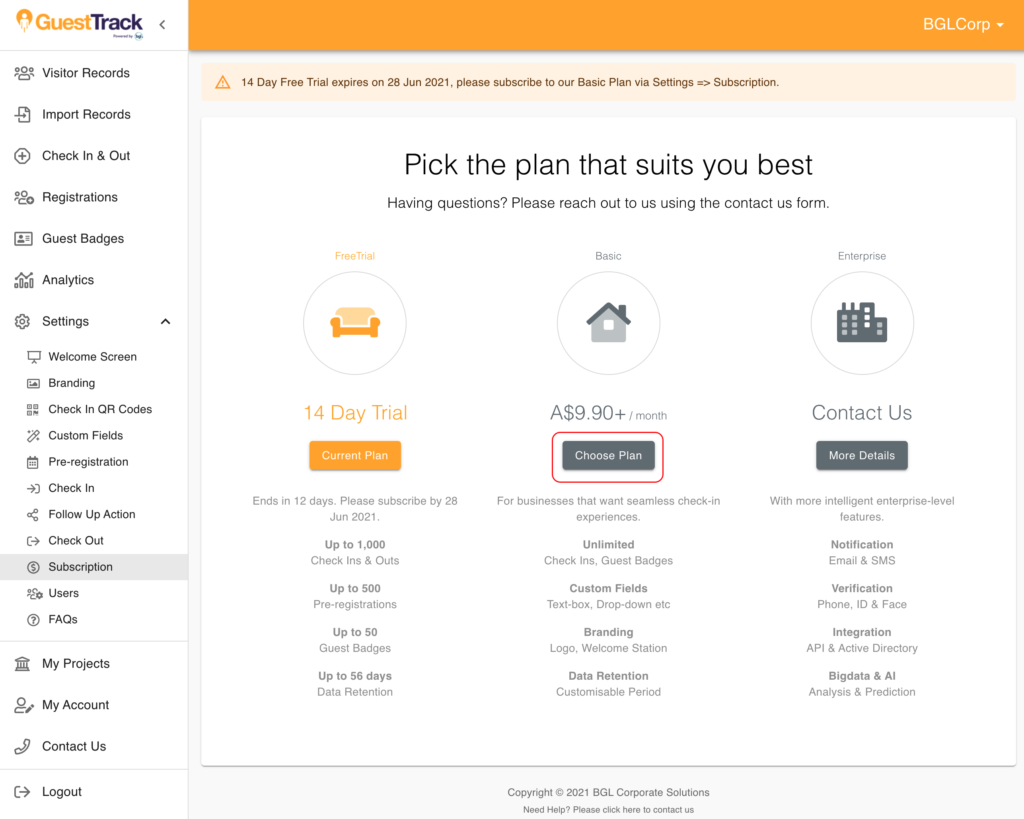
Step 1: Subscribe User Role feature
Navigate to Settings > Subscription. Select Basic plan.
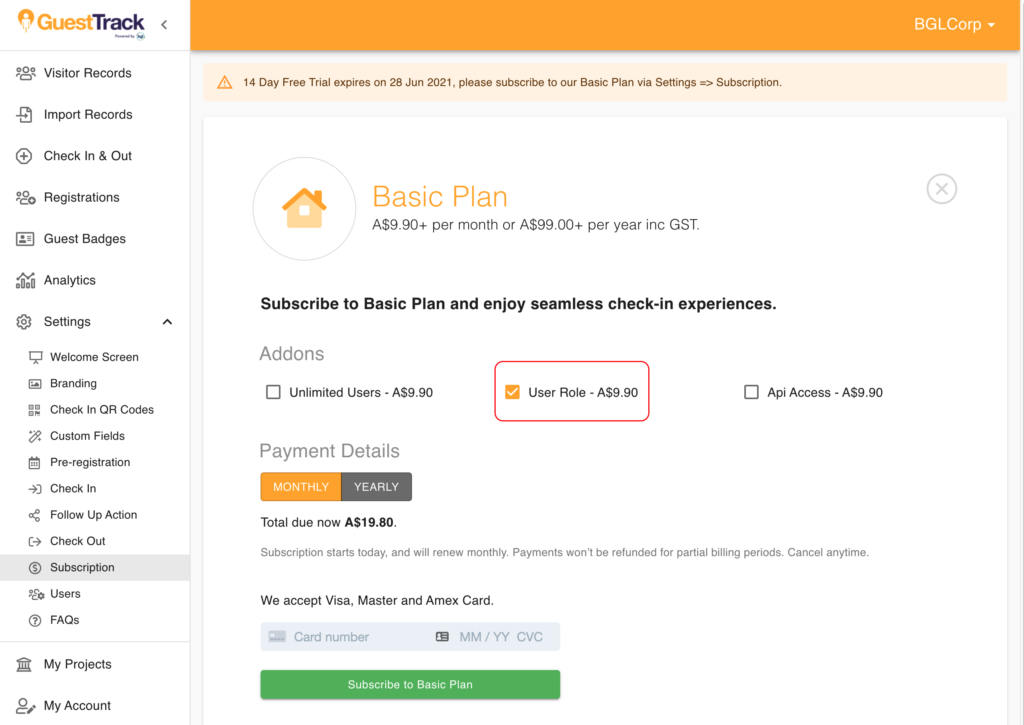
On the next page, select User Role and finalise payment.
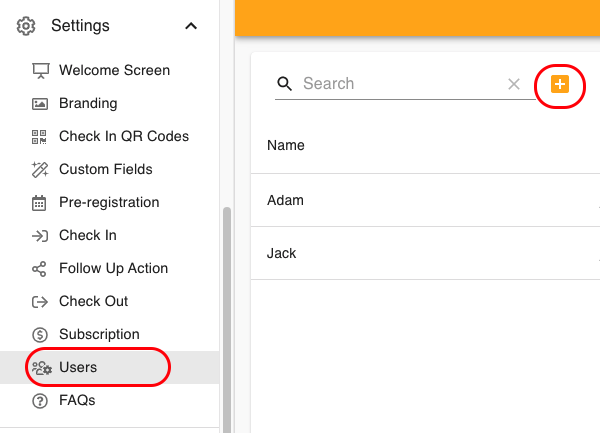
Step 2: Add new users and assign user role
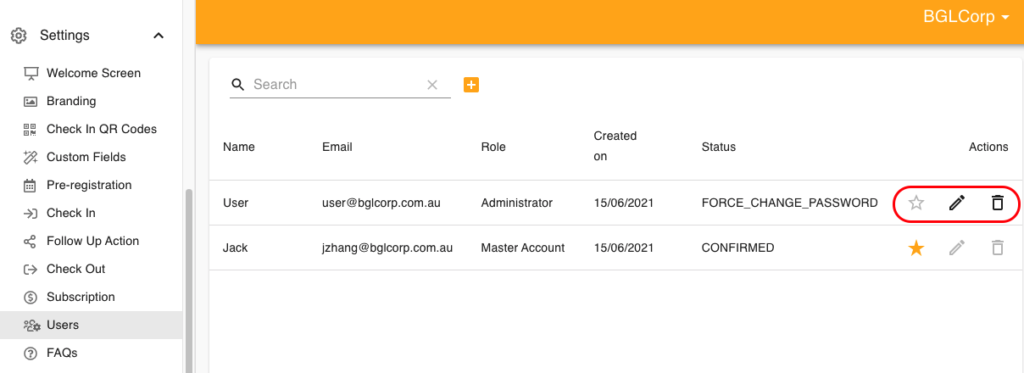
Navigate to Settings > Users. Click on the "+" button.
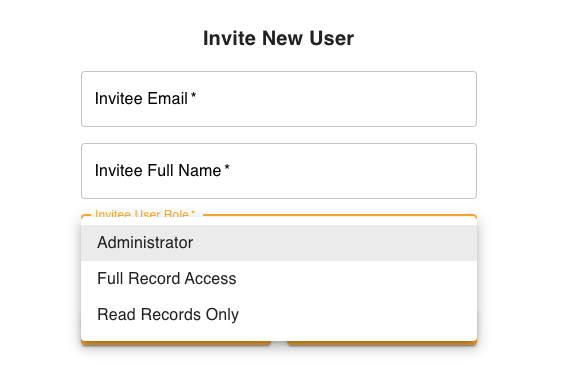
On the next page, fill in the Invitee's information and select a role for this user.
Step 3: New user login
The Invitee will receive an invitation email with a link and a temporary password. Click the link and login in with the provided password. The new user will then prompt to change New Password to complete login.
User Management
The master account can:
- Transfer master account to another user*
- Modify user's role
- Delete user
*Transfer master account will remove the master privilege from the current user. Proceed with caution.